
Homemade Moisturizer for Dry Skin: Effective DIY Solutions
Struggling with dry skin can be a frustrating and ongoing battle for many. The commercial skincare market is saturated with products that promise hydration, yet many contain harsh chemicals that can exacerbate the issue. A homemade face mask for dry skin offers a natural alternative that is not only effective but also customizable to suit individual needs. By creating your own homemade face moisturizer for dry skin, you can ensure that your skin receives the nourishment it deserves. Discover the transformative power of a DIY skin moisturizer that works in harmony with your skin’s natural processes.
Are you ready to explore the world of homemade moisturizers for dry skin? These DIY solutions are crafted from simple, accessible ingredients and provide deep hydration without the downsides of synthetic additives. Let’s dive into the process of making a nourishing homemade moisturizer that revitalizes and protects your skin.
Why Choose a Homemade Moisturizer for Dry Skin?
Choosing a homemade moisturizer for dry skin offers numerous advantages. Commercial moisturizers often contain preservatives and fragrances that can irritate sensitive skin. In contrast, a homemade option allows you to control every ingredient, ensuring they are gentle and effective. Moreover, creating a DIY skin moisturizer is cost-effective and environmentally friendly, reducing waste from packaging.
Homemade moisturizers can be tailored to address specific concerns, such as flakiness or irritation, by incorporating natural emollients like shea butter or hydrating agents like aloe vera. This customizability makes them ideal for anyone looking to achieve a healthy, glowing complexion.
How to Make a Homemade Face Mask for Dry Skin
Creating a homemade face mask for dry skin is a simple process that can be tailored to your specific needs. Start with a base of moisturizing ingredients such as honey, which is a natural humectant and helps retain moisture. Add nourishing elements like avocado or oatmeal, which soothe and provide vitamins essential for skin health.
Mix these ingredients into a paste and apply it evenly across your face, avoiding the eye area. Let it sit for about 15-20 minutes before rinsing off with lukewarm water. This mask can provide an instant boost of hydration, leaving your skin feeling soft and supple.
Ingredients for a Homemade Face Moisturizer for Dry Skin
The key to an effective homemade face moisturizer for dry skin lies in selecting the right ingredients. Natural oils like coconut oil, jojoba oil, and almond oil are excellent for their hydrating properties. These oils mimic the skin’s natural sebum, providing a protective barrier that locks in moisture.
In addition to oils, aloe vera gel can be included for its soothing and anti-inflammatory benefits. Adding essential oils such as lavender or chamomile can enhance the moisturizing cream’s calming effect, making it perfect for bedtime use.
Step-by-Step Guide to Creating a DIY Moisturizer for Dry Skin
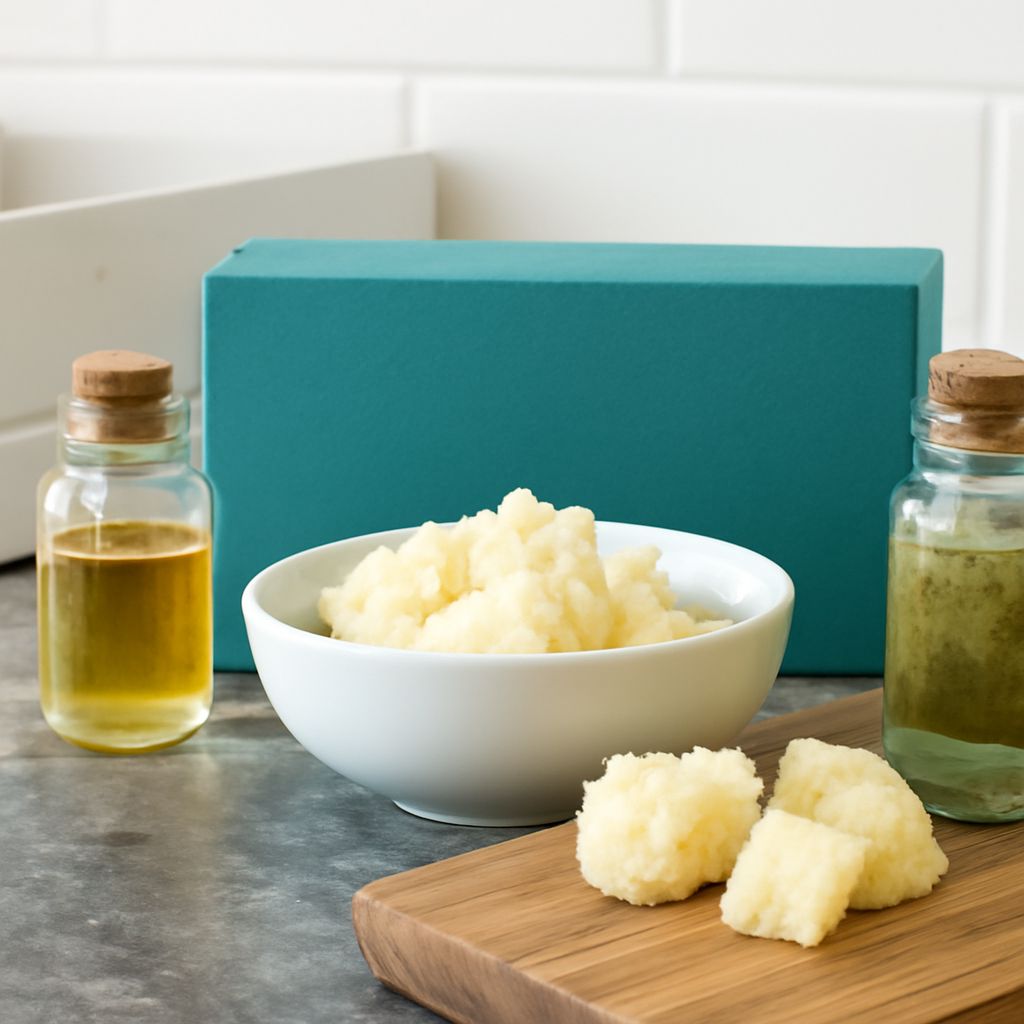
To make a DIY moisturizer for dry skin, begin by melting 1/4 cup of shea butter and 1/4 cup of coconut oil in a double boiler. Once melted, remove from heat and let it cool slightly. Stir in 1 tablespoon of almond oil and 10 drops of your chosen essential oil.
Transfer the mixture to a glass jar and let it solidify at room temperature. For a whipped consistency, you can use an electric mixer to whip the moisturizer once it has partially set. Apply this luxurious cream to your skin daily, focusing on areas prone to dryness.
Benefits of Using a DIY Skin Moisturizer
Using a DIY skin moisturizer offers several benefits beyond mere hydration. These homemade concoctions often contain fewer allergens and irritants, making them suitable for sensitive skin types. The natural ingredients used promote a healthier skin barrier, leading to improved resilience against environmental stressors.
A DIY moisturizer also encourages the skin to maintain its natural oil balance, reducing the risk of overproduction of sebum, which can lead to breakouts. This holistic approach nurtures the skin from within, fostering long-term skin health.
Common Mistakes to Avoid When Making Homemade Moisturizers
While making homemade moisturizers is relatively straightforward, there are common pitfalls to avoid. Overuse of essential oils can lead to irritation; always use them sparingly and perform a patch test. Additionally, ensure that all utensils and containers are sterile to prevent contamination.
Another mistake is using ingredients that are too heavy for your skin type. Although rich oils are hydrating, they can clog pores if not used in moderation. Adjust the amount of oil based on your skin’s specific needs to achieve optimal results.
How Often Should You Use a Homemade Moisturizer?
The frequency with which you should apply a homemade moisturizer depends on your skin’s needs. Generally, applying it once or twice daily is recommended, especially after cleansing your skin. For those with extremely dry skin, reapplication throughout the day may be beneficial.
It’s essential to listen to your skin and adjust the use accordingly. Pay attention to how your skin responds and tweak your regimen to maintain a balanced and hydrated complexion.
Frequently Asked Questions About DIY Moisturizers for Dry Skin
Can I use a homemade moisturizer on oily skin? Yes, but select lighter oils like jojoba or grapeseed to avoid clogging pores.
How should I store my DIY moisturizer? Store it in a cool, dry place away from direct sunlight to prolong its shelf life.
Are there any safety considerations? Always conduct a patch test before applying to your face, and be cautious with essential oils if you have sensitive skin.
Bottom line: Homemade moisturizers offer a personalized, natural, and effective approach to caring for dry skin. By understanding the ingredients and tailoring them to your needs, you can create a moisturizing routine that enhances your skin’s health and radiance. Always prioritize skin safety by testing new formulations and enjoying the benefits of your DIY endeavors.

Leave a Reply